Final Image

Create a New Document, select Pen Tool (P) and draw your love shape.

Step 2
Select Brush Tool (B) and go to the Brushes Option, follow the setting below.


Step 3
Set your foreground color to #ff0300 (red). Select Pen Tool (P) back, then right click on your love shape, choose Stroke Path. When the Stroke Path dialog box appear, select Brush.


Step 4
Here is the result of your 'love'. After that, click the Brush Tool (B) back, no need to change the setting, fill your 'love' with the shape.


Step 5
To create a nice lighting for your 'love', create a new layer then change your Brush Tool (B) with these setting, and paint it with a nice curve.

 Step 6
Still on the 'lighting' layer, go to Filter > Blur > Gaussian Blur and follow the value below. Try to decrease the opacity 'lighting' layer to get a better result.

Step 7
We'll create a shadow for it. Duplicate the 'love' layer, put the 'love copy' under 'love' layer then go to Edit > Transform > Flip Vertical. After that, go to blending option for 'love copy' layer and set the Color Overlay to Black. Then, follow step 6 and change the value to get a nice shadow.


Step 8
To create a nice color for your 'love', select 'love' layer, then go to blending option and follow these setting. #ea0909 and #770808 for the gradient. Choose Radial for the style and you can move the focus point by dragging the shape while the dialog box still open.

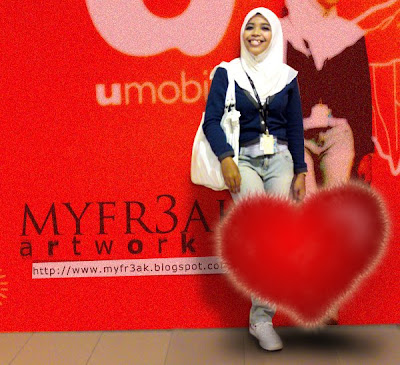
FINAL
Decorate your artwork with placing suitable picture. Here is mine!

hello! first time visiting :)
ReplyDeletegreat tutorial! :D
cheers! ^^
Thank you Shu Fen! ;)
ReplyDelete