This is the original image that we will use in this tutorial

See the right picture, that is the final image that we will have ;)

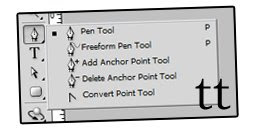
Step 1
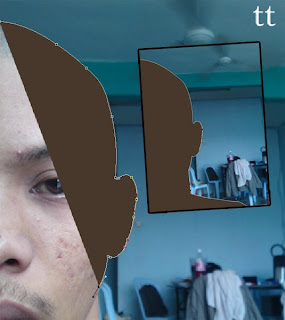
Open the picture. We will remove the background and the best tool for it is Pen Tool. Select Pen Tool (P), draw the outline of the picture.
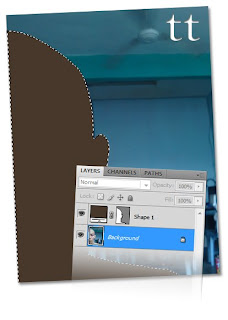
Step 2


Step 2
After you finish draw the shape of the picture, press ctrl (win) click on Vector Mask Thumbnail on "Shape 1" layer. It will select your image. Click once at the background layer, then go to Layer > New > Layer via Copy. It will cut out your selected image. Name it as "New".
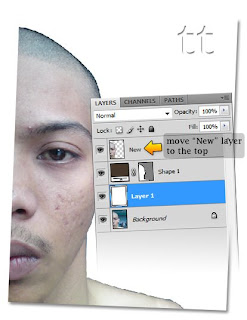
 Step 3
 Step 3
Move your "New" layer to the top, then create a new layer above background image and color it with white (#FFFFFF) to cover the background image.
 Step 4
 Step 4
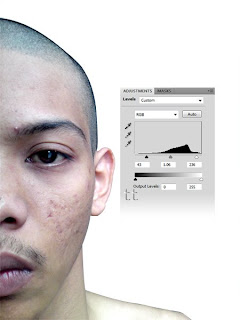
Go to Image > Adjustments > Level or press CTRL + L. Insert the value in the box (43),(1.06) and (236) or try to make the photo become more realistic.
 Step 5
 Step 5
Go to Image > Adjustments > Brightness/Contrast, set the brightness to 9 and contrast to 62.
 Step 6
 Step 6
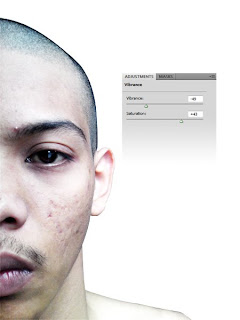
Next, go to Image > Adjustments > Vibrance, and set the vibrance to -49 and Saturation to +43.
 Step 7
 Step 7
As you can see, the eye kind a little darker. To make the shining eye, select Pen Tool (P) and draw the eye shape.

Step 8


Tadaa, you're done! Here the final image with some text ;) Enjoy!

superb!
ReplyDeleteThanks for the comment 3ff4!
ReplyDeletewah...
ReplyDeletecm 2 ae...